
CREATING A PARTICIPANT RECORD
How to use this PDS section: Programs have a centralized system in place to ensure that when they receive a referral for a parent who may engage in services, staff can accurately document the receipt of that referral. Creating participants is typically a PDS activity completed by Program Coordinators, Supervisors or administrative team members.
Why this information is important: The participant record is the jumping-off point for many other PDS records—keeping this information complete, accurate, and up-to-date helps programs best serve families.
HFM policies related to this PDS section: Eligibility Policy, Service Level and Creative Outreach Policy, Standardized Assessment & Information Gathering Policy
Step-by-step instructions:
Fields with an asterisk (*) are required.
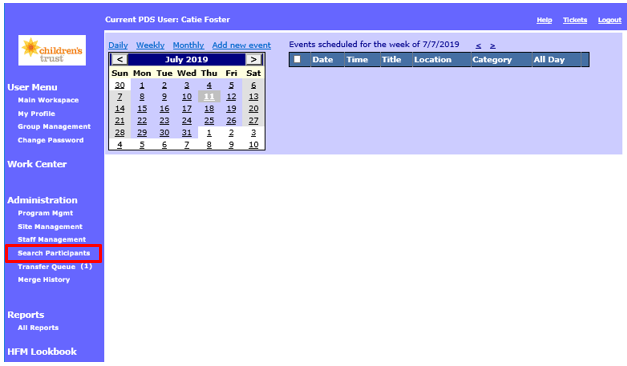
1. Before creating a new participant record, search existing participants to make sure you do not create a duplicate record for a participant already in PDS. In the “Administration” section on the left hand side of the screen click on Search Participants.
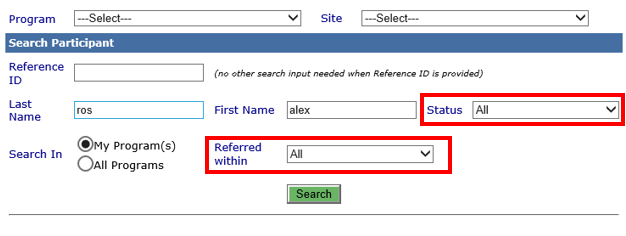
2. Enter the participant’s first and last name. To search you must enter at least one letter in the last name field.
Tip: You don’t have to type the participant’s entire name to search for him/her. In the example below, the user is searching for a sample participant named Alexandra Rose. The user entered “Ros” into the Last Name field and “Alex” in the First Name field. Typing just the first few letters of a name might be helpful if you are unsure that you have the correct spelling.

2.1 Leave the Status and Referred within fields set to All. This ensures that you search for all participants ever referred to HFM.
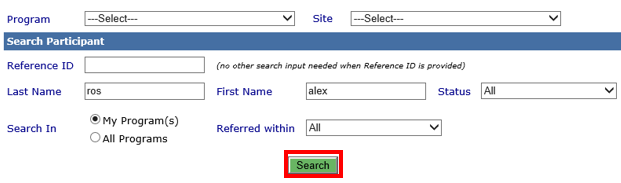
2.2 Click Search.
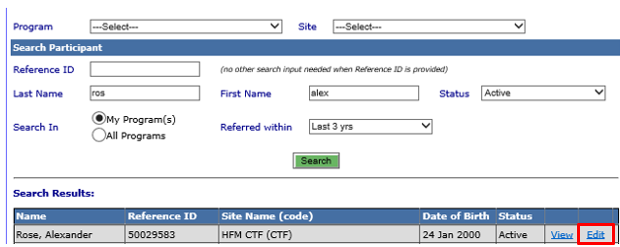
2.3 If the participant’s name with the same date of birth displays and the participant status is active, he or she is already a participant in your program. Select Edit to begin working in this participant’s records.
2.4 If the participant’s name with the same birth date displays and the participant is inactive, the participant has been referred to the HFM program at your site previously. You may re-enroll these participants if they are still eligible for services. Select Re-enroll. The participant’s information from the first time he/she participated in Healthy Families will auto-populate in the intake form. Update and/or complete the participant information using the steps below. 
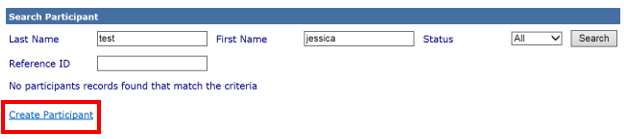
3. If the participant’s name with the same date of birth does not appear, click Create Participant to create a record for this new participant.
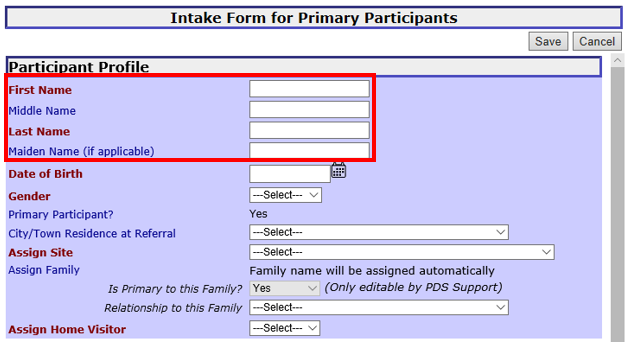
4. You should now be on the Intake Form for Primary Participants.
5. Enter the following information in the “Participant Profile” section.
5.1 *First Name: Enter the participant’s first name.
5.2 Middle Name: Enter the participant’s middle name.
5.3 *Last Name: Enter the participant’s last name.
5.4 Maiden Name (if applicable): Enter the participant’s maiden name.
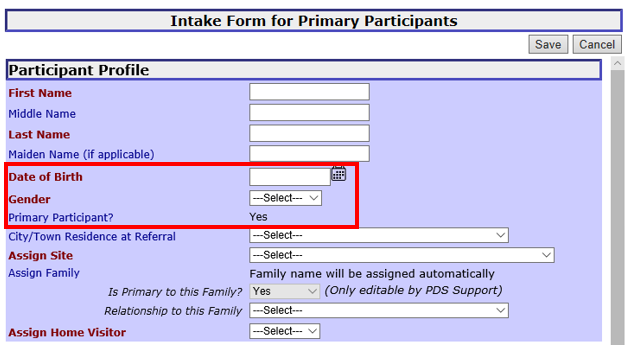
5.5 *Date of Birth: Enter the participant’s date of birth.
5.6 *Gender: Select the gender identified by the participant in the drop down menu:
5.7 Primary Participant: Yes will auto-populate in this field. See Creating a Secondary Participant for more information on documenting co-parents in services.
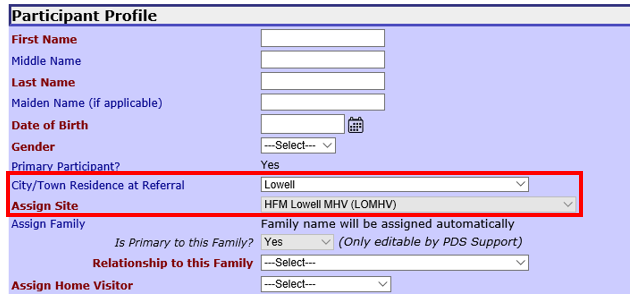
5.8 *City/Town Residence at Referral: From the dropdown menu, select the city or town where the new participant lives at the time s/he is referred to the program.
5.9 *Assign Site: The site code will populate based on the City/Town Residence at Referral selected. In the example below, selecting Lowell as City/Town Residence at Referral means that HFM Lowell populates in the Assign Site field.
5.10 Assign Family: This will auto-populate after you save the participant record. PDS will automatically assign a family name for the participant and his/her/their family.
5.11 Is Primary to this Family? This field defaults to Yes and cannot be edited. If you need to update the participant’s primary status, please submit a ticket to PDS support.
5.12 *Relationship to this Family: Select the participant’s relationship to the family in the drop down menu:
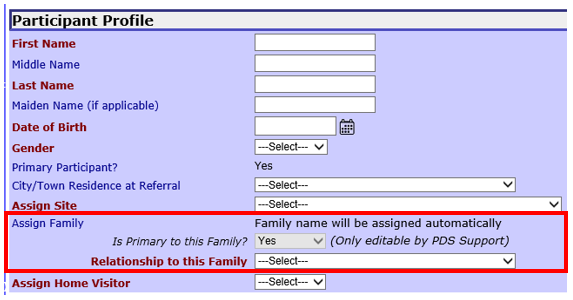
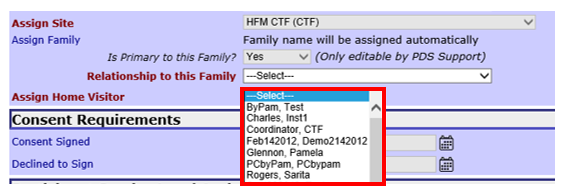
5.13 *Assign Home Visitor: From the dropdown menu, select the staff person who will work with this participant on his/her caseload. This dropdown menu populates with staff working at the site selected in Assign Site. In the example below, the staff in the dropdown menu are from a fictional site called HFM CTF.
6. Enter the following information in the “Consent Requirements” section. In most cases, programs do not have this information at the time they are creating a new participant in PDS. You can create a participant without saving information in the “Consent Requirements” section and return later to update the profile.
6.1 Consent signed: Check the box if the participant signed the HFM consent form.
6.1.1 Signed date: Enter the date that the participant signed the HFM consent form. This field is required if you checked the Consent Signed box.

6.2 Declined to sign: Check the box if the participant declined to sign the HFM consent form.
6.2.1 Declined date: Enter the date that the participant signed the HFM consent form. This field is required if you checked the Declined to Sign box.

6.3 You may check either the Consent Signed or Declined to Sign box; you cannot check both. When one box is checked, the other box is grayed out and inactive.
6.4 If Consent Signed was checked off, the current program staff will be able to view all records created/maintained by prior program(s). If Declined to sign was checked off, the current program staff cannot view any records created/maintained by prior program(s) but participants can still enroll in services.
7. Enter information in the “Participant Service Level Assignment” section.
7.1 *Service Date: Enter the date the referral was received.
7.2 Service Level: Leave this drop down menu as Outreach—every participant’s first service level at referral should be Outreach, unless the participant self-referred.
7.2.1 Specify Reason: Please do not enter any data here.

8. Enter information in the “Participant Referral” section.
8.1 *Referral Date: Enter the date you received the referral, not the date you enter the referral into PDS. Ideally referrals are entered into PDS as soon as they are received.
8.2 Date of First Contact/Enrollment: Leave this field blank until you have contacted the participant. Upon first contact with the participant via phone or face-to-face interaction, whichever happens first, enter the date of that contact here. See the Creating a Referral section of this manual for more information on completing this field.
Important note for participants who self-refer: If the participant was a self-referral do not enter the date of first contact at the time of creating the participant. The contact log must be updated before a date of first contact can be entered. Please see Using the Contact Log for instructions on making contact log entries.

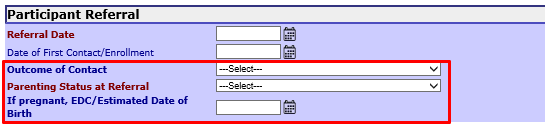
8.3 Outcome of Contact: This field remains blank until you have contacted the participant. Based on the response the participant has to the program offer of services, select the appropriate outcome from the drop down box. See Creating a Referral for more information on completing this field.
8.4 *Parenting Status at Referral: Select the appropriate response based on the participant’s parenting status:
8.5 If pregnant, EDC/Estimated Date of Birth: Enter the estimated date of birth for the baby if the participant was pregnant/expecting to become a father at the time of referral. If the child has been born at the time of referral, this can be left blank.
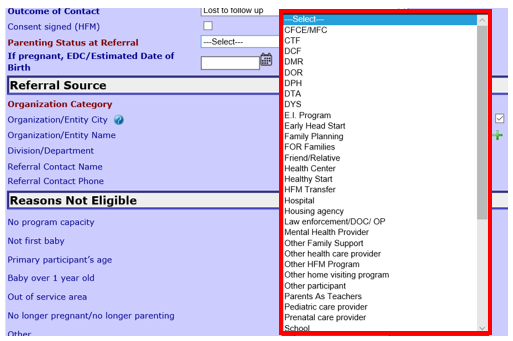
9. Enter information in the “Referral Source” section. As the instructions show, you can select from an existing referral source or enter information to save a new referral source in PDS.
9.1 *Organization Category: Select the option from the dropdown menu that best describes the referral source for this participant.
9.2 Organization/Entity City Select the Referral Source organization’s city from the drop down menu. If the organization is in a Boston neighborhood, you must select Boston.
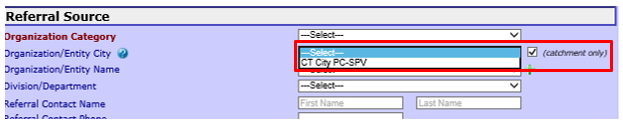
9.2.1 Catchment only: By default, the Catchment only checkbox is selected when creating a new participant. When this box is checked, you will see only towns and cities in your catchment area. Un-select this box if you want to enter a referral source outside of your catchment area. In the example below, the user can only see the city in the catchment area (CT City) when the box is selected. When the user un-selects the box, all Massachusetts towns appear in the dropdown menu.

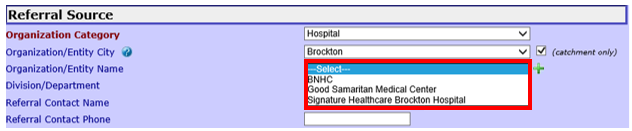
9.3 Organization/Entity Name Depending on the organization category and city you select, the organization/entity name may already be saved in PDS. The dropdown menu will populate with previously saved referral sources. Check the dropdown menu to see if the organization/entity name is listed. In the example below, the there are three hospitals already listed in Brockton.
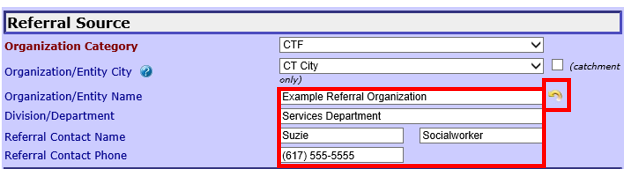
9.3.1 If you do not see the organization/entity name in the drop down menu, you can create a new organization/entity by clicking the green plus sign next to the drop down menu.

You will be able to enter information in the Organization/Entity Name, Division/Department, Referral Contact Name, and Referral Contact Phone fields. Click the yellow arrow button if you want to return to the dropdown menus without entering information.
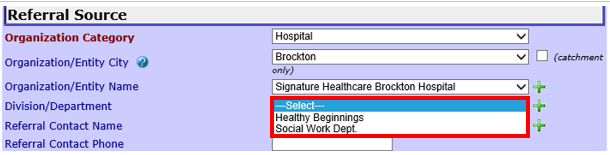
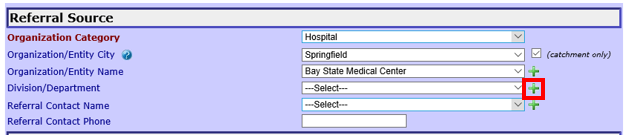
9.4 Division/Department If you selected an existing organization in step 9.3, you may see a division/department already saved in the dropdown menu. If you see the referral source’s division/department listed, select it. In the example below, there are two departments already listed for one of the hospitals in Brockton.
9.4.1 If you do not see the division/department in the dropdown menu, you can create a new entry by clicking the green plus sign next to the division/department name drop down menu. Follow the instructions in step 9.3.1 to enter information.
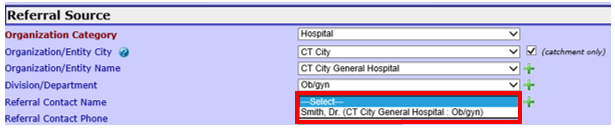
9.5 Referral Contact Name If you selected an existing organization, you may see a referral contact name already saved in the Referral Contact Name field. If you see the contact’s name listed, select it. In the example below, there is one referral contact name already saved in PDS.
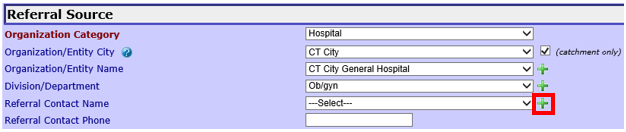
9.5.1 If you do not see the referral source contact name in the dropdown menu, you can create a new entry by clicking the green plus sign next to the referral contact name drop down menu. This step is not required if you do not have a specific contact at the referring organization. Follow the instructions in step 9.3.1 to enter information.
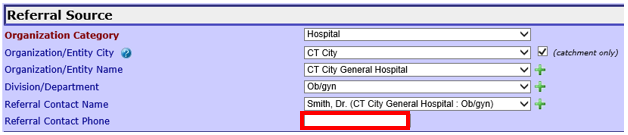
9.6 Referral Contact Phone If you selected an existing referral contact, a phone number may appear in this box. If a number does not appear or if the contact phone number is out of date, enter a new referral contact number.
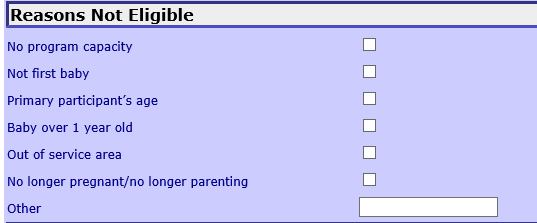
10. If applicable, select reasons that the participant is not eligible for services in the “Reasons Not Eligible” section. Refer to the Eligibility Policy (especially section II: Ineligibility) for an explanation of each reason the participant is not eligible. Select each check box that is appropriate:
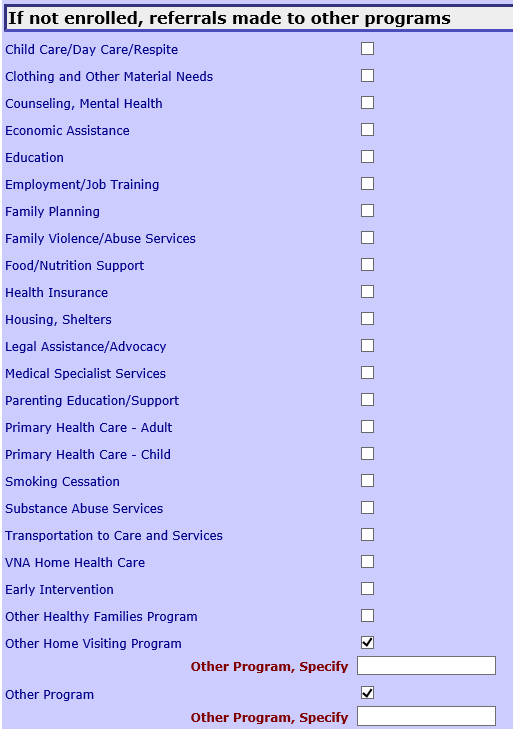
11. Enter information in the “If not enrolled, referrals made to other programs” section. If a participant does not enroll but HFM staff provide other referrals, check the box for each referral made. If you select Other Home Visiting Program or Other Program can enter the name of the program in the text box next to the check box.
12. Save: Click to save the participant’s new record.
13. Cancel: Select to exit the participant record without saving.

14. PDS will generate the message below if you attempt to create a participant that already exists in the data system.
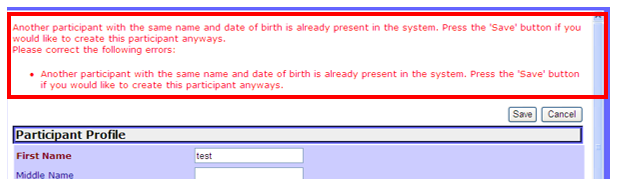
15: Before You Save This Participant’s Record: By creating this participant, you may be creating a record for a participant that received services from another site. With the participant’s permission by signing a new HFM Consent form you may seek to merge the record you created for him/her with the record from the previous site.
At first contact ask participant: “Have you ever been in Healthy Families? Have you ever had a Healthy Families home visitor?”
16. PDS will generate a message to indicate an error if you attempt to create a participant that is not eligible for the program due to his/her age. Double check the date of birth from the referral and with the participant to ensure that he/she is eligible for services.

Creating a Participant (Sept 2019)
©2019 MA Children's Trust