INTRODUCTION AND OVERVIEW
Welcome to the Participant Data System (PDS)! PDS collects data on activities related to service delivery with home visiting participants and facilitates permissible information sharing among users of the system, including the Children’s Trust’s network of Healthy Families Massachusetts (HFM) sites.
PDS is a companion to participant paper records in summarizing the work each home visitor has completed with a participant. PDS documentation serves as a historical record to guide work with participants, track progress toward achieving goals and provide valuable data for evaluation. For these reasons, information should be entered into PDS as soon as possible. Home visitors must document all activities that occur during a home visit in PDS within 7 calendar days.
PDS allows:
This manual is designed to familiarize you with PDS and help you navigate through the system forms. Additionally, you will find that there are descriptions of the types of information expected to be captured in PDS. Read through this manual before and after you complete the Children’s Trust Documentation training and use it as a reference tool in your daily work. You can access the entire manual online, either through the HFM Online Resource Library or directly in PDS.
While there are several types of user rights in PDS, the most typical access rights are those of home visitor, supervisor and program coordinator. The manual is organized based on these roles.
Working in PDS
1. PDS is a web-based database system. This means that the system is available on any computer with internet access; however, there are important considerations for optimal functionality:
2. To make PDS usage easiest and most reliable, use the latest version of Microsoft Edge or Google Chrome. While you may be able to view PDS with other browsers including Internet Explorer, Mozilla Firefox, and Apple Safari, the look and functionality may be limited and/or unpredictable.
Note: Microsoft Edge was officially unveiled on January 21, 2015 and it has replaced Internet Explorer as the default browser on Windows 10. Internet Explorer is still installed in Windows 10 in order to maintain compatibility with older websites and intranet sites that require Active X and other Microsoft legacy web technologies. Though currently supported, PDS will stop supporting Internet Explorer at some point in FY 2020 (date to be determined).
3. Just like participant paper records, all PDS records are confidential. Only authorized users are allowed access to PDS. You should:
4. Each type of PDS user has specific limitations in accessing records to maintain confidentiality:
5. Anyone who has access to PDS can log into the HFM Program Portal website using their PDS credentials. If you are already logged in to PDS, you can launch the HFM Program Portal directly without re-entering your log-in name and password.
III. PDS Conventions
PDS has similar types of actions as other databases and web pages you may have seen.
A. Saving
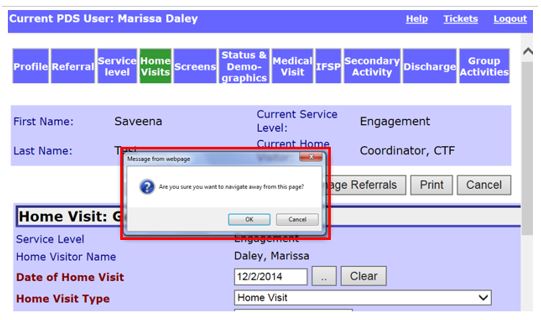
Save work frequently to avoid losing data. PDS will not automatically save work in progress. Remember to save work before leaving a page. Do not use the Back button on the browser after entering information into a form because it may cause the system to lose any unsaved data.
B. Time-Outs
PDS automatically “times-out” and logs out when there is no interaction for a period of time. This protects the confidentiality of data. When a session times-out, unsaved work is lost.
C. Actions and Functions
Throughout PDS, you will use buttons, links, text boxes, drop down menus and other fields to navigate through the system and record information. Each PDS page is different, but the actions and functions below appear many times throughout the system.
|
PDS Actions and Conventions |
Example |
|
|
Dropdown |
|
|
|
Button |
|
|
|
Link |
|
|
|
Textbox |
|
|
|
Radio Button |
|
|
|
Checkbox |
|
|
|
Scroll Bar |
|
|
|
PDS Functions |
Select |
|
|
Check Spelling |
|
|
|
|
|
|
|
Save |
|
|
|
Cancel |
|
|
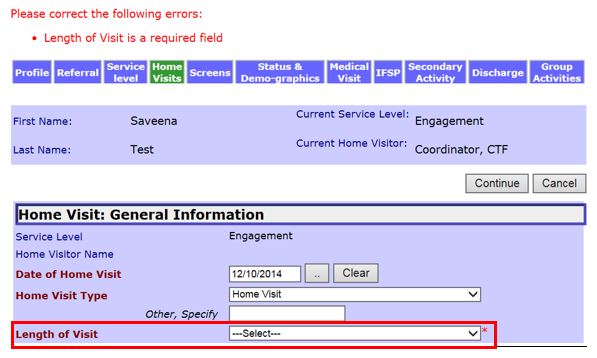
D. Required Fields
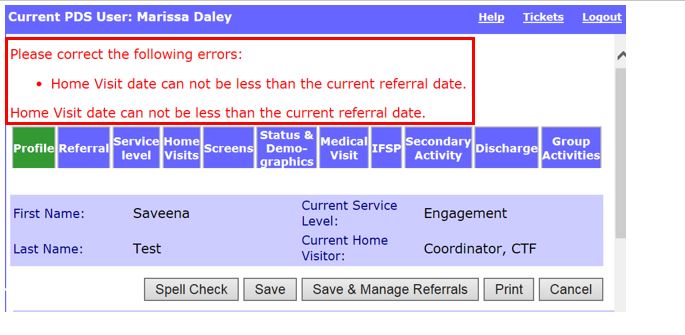
On most forms in PDS, there are required fields. This information must be collected and entered before you can save the record. Required fields are displayed in red in PDS and denoted with an asterisk (*) in the manual.
E. Information Collected for Massachusetts Home Visiting Initiative Benchmarks
Some PDS information is collected and used by the Department of Public Health to report on the performance of the Massachusetts Home Visiting Initiative to federal funders. These fields are displayed in bold. While these fields are important, Healthy Families Massachusetts programs are required to complete all applicable fields in PDS.
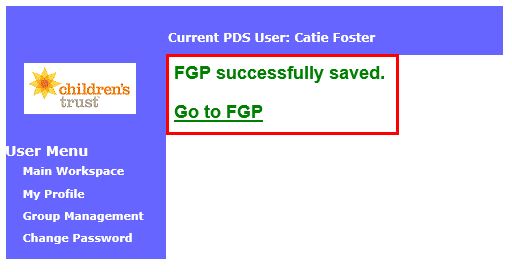
F. System confirmations and warnings
G. Dates
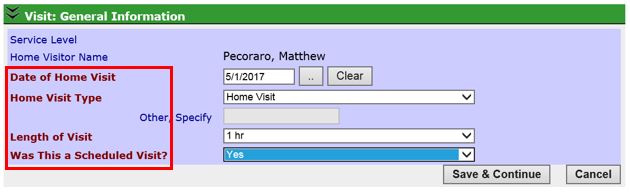
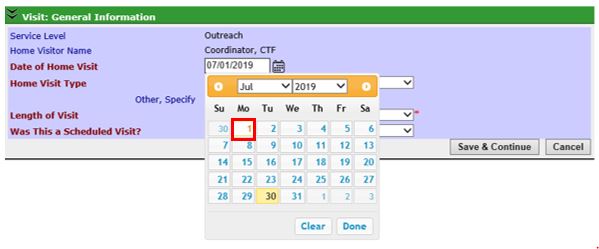
Dates in PDS forms are selected using a pop-up calendar. A calendar button displays next to any field where a date is required. To enter a date:
1. Click on the small calendar icon to open the calendar pop up box.
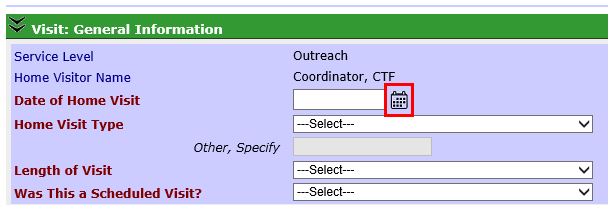
2. The date always defaults to today’s date. Use the drop down menus to select the month and year of the date you want to select.
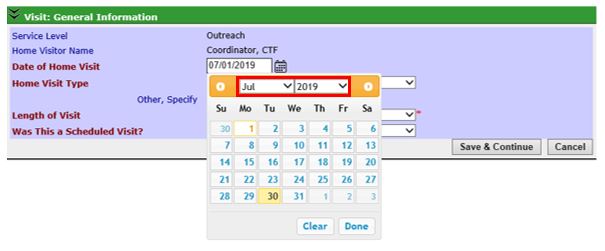
3. Alternatively, use the arrows to scroll through months.

4. Click the date you want to enter. The date will be inserted in the date field when you click it.
Introduction and Overview (Sept 2019)
©2019 MA Children's Trust